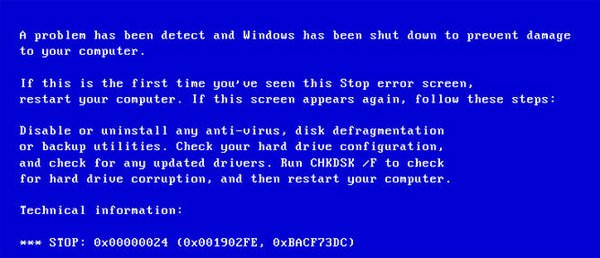
Эффективные способы исправить ошибку «err insecure response»
Эффективные способы исправить ошибку «err insecure response»
Многие пользователи хоть раз сталкивались с тем, что во время открытия сайта браузер показывал уведомление с ошибкой «net ERR INSECURE RESPONSE». Существует несколько способов устранить неисправность.
Проблема заключается в том, что существуют сайты, которые используют протокол WebSocket, он предназначен для защиты от хакерских атак. При отправке запроса на подключение к сайту обозреватель принимает ответ от источника в котором находятся этот сертификат безопасности, именно из-за него появляется ошибка, поскольку компьютер его блокирует. Чтоб удостовериться следует просто открыть консоль сочетанием клавиш Ctrl+Shift+I, и перейти во вкладку «Console».
Переводится ERR_INSECURE_RESPONSE, как «Ошибка: небезопасный ответ».
Последующие шаги
Для очистки реестра Windows от ошибок, которые могут появиться после выполнения вышеописанных действий, используйте программу CCleaner.
- Запустите CCleaner → вкладка Реестр → Поиск проблем → Исправить.
- При появлении запроса «Сохранить резервные копии сделанных изменений» выберите нужный вариант → Исправить отмеченные → Закрыть.
Сегодня интернет стал для очень большого числа жителей планеты ежедневной необходимостью. Неудивительно, что возможные проблемы, связанные с доступом на страницу нужного ресурса, сразу портят настроение человека. К сожалению, но вариантов столкнуться с одной из неприятностей на просторах сети очень много. Одной из них является появление надписи «err empty response».
Естественно, что изначально следует узнать – что за ошибка err empty response? Доктор Ай-Тупит сделал это за вас, поэтому не стоит тратить время на поиск информации по этому вопросу в других источниках. Если объяснить на простом языке, то код ошибки err empty response появляется из-за того, что что-то, непосредственно на компе пользователя, блокирует доступ к нужной интернет-страничке, даже если сайт прекрасно откликается на запрос человека.

Итак, существует две основных первопричины, которые приводят к состоянию «данные не получены err empty response»:
- Поражение некоторых важнейших областей операционки вирусными программами.
- Пользователь выполнил неправильную настройку сетевого подключения или оно, по каким-то причинам, было сбито.
Причины довольно банальны, поэтому решить вопрос с тем, как исправить err empty response не должно вызывать осложнений у человека, с правильно растущими руками.
Отключение антивируса
Не стоит исключать момент блокировки сайтов антивирусом или брандмауэром. На время отключите защитное ПО чтобы проверить этот вариант. Подробнее об отключении Доктор Веба.
При необходимости можно добавить браузер и адрес ресурса в список исключений.
Также некоторые антивирусы оснащены функцией фильтрации HTTPS трафика. Попробуйте отключить ее на время.

Решение проблемы net ERR INSECURE RESPONSE
В большинстве случаев ошибка net ERR INSECURE RESPONSE возникает по причине небезопасного сертификата сайта. Поэтому, чтобы исправить эту ситуацию, стоит в настройках браузера выполнить добавление корневого сертификата. Для того, чтобы это сделать, выполняем следующее:
- Необходимо сохранить sertificate, кликнув по надписи: «Сделать исключение…», или же выделить ссылку и через контекстное меню (клик правой кнопкой мышки) выбрать «Сохранить как…».
- В имени файла необходимо оставить только домен (убрав https://) и поменять расширение с «txt» на «crt», чтобы получилось, к примеру, softikbox.crt.
- Если открыть сохраненный файл, то получится следующее:

- Далее открываем браузер. Выбираем «Настройки», «Дополнительные настройки» и кликаем «Настроить сертификаты».

- В новом окне нажимаем «Импорт».

- Указываем путь к сертификату.
- Следуем подсказкам Мастера установки сертификатов.
Важно отметить, что после добавления сертификата нужно обновить страницу, на которой появляется данная ошибка. Для этого можно воспользоваться специальной кнопкой или же нажать «F5».
В браузере Яндекс добавление сертификата стоит выполнить через «Настройки», «Дополнительные настройки», «Управление сертификатами».

Далее появится такое же окно, как и в Google Chrome. Следуем подсказкам Мастера установщика сертификатов.

После добавления сертификата стоит перезагрузить систему.
В случае, если ошибка не исчезает, то проблема кроется в самом сайте. Придется подождать, когда владелец сервиса самостоятельно её исправит.
Почему я это вижу?
Такой вопрос задают себе многие пользователи, которые в «Одноклассниках» переходят на внешние ресурсы по ссылкам, и вместо контента сталкиваются с данным сообщением. О чем это говорит?
Дело в том, что некоторые сайты используют для защиты от хакерских атак специальный протокол WebSocket, помимо привычного соединения типа TCP. Как результат, при обращении к таким источникам, Яндекс браузер отправляет запрос, а вместе с обратным ответом предоставляется сертификат безопасности, который блокируется на компьютере. Чтобы увидеть причину, достаточно просмотреть консоль, нажав в окне Ctrl + Shift + I , и перейдя на вкладку «Console»:

Перевод уведомления с кодом ERR_INSECURE_RESPONSE звучит как «ошибка: небезопасный ответ». Думаю, теперь ситуация чуть прояснилась для Вас.
To use the Async Clipboard API while supporting all browsers, test for navigator.clipboard and fall back to earlier methods. For example, here’s how you might implement pasting to include other browsers.
That’s not the whole story. Before the Async Clipboard API, there were a mix of different copy and paste implementations across web browsers. In most browsers, the browser’s own copy and paste can be triggered using document.execCommand(‘copy’) and document.execCommand(‘paste’) . If the text to be copied is a string not present in the DOM, it must be injected into the DOM and selected:
In Internet Explorer, you can also access the clipboard through window.clipboardData . If accessed within a user gesture such as a click event—part of asking permission responsibly—no permissions prompt is shown.
Настройка
Драйвер хранения
Драйвер хранения Docker (storage driver или graph driver) значительно влияет на производительность. Его задача — эффективно хранить слои образов контейнеров, то есть когда несколько образов совместно используют слой, только один слой использует дисковое пространство. Совместимая опция `devicemapper` предлагает неоптимальную производительность, которая просто ужасна на вращающихся дисках. Кроме того, `devicemapper` не рекомендуется использовать в промышленной среде.
Поскольку Arch Linux поставляется с новыми ядрами Linux, нет смысла использовать опцию совместимости. Хороший, современный выбор — overlay2 .
Выполните # docker info | grep -i storage , чтобы увидеть текущий драйвер хранилища. Новые установки Docker уже должны использовать overlay2 по умолчанию.
Отредактируйте файл /etc/docker/daemon.json (создайте его, если он не существует), чтобы изменить драйвер хранения:
После чего перезапустите Docker.
Дополнительную информацию о доступных опциях можно найти в руководстве пользователя. Также см. документацию dockerd для получения информации о параметрах daemon.json .
Remote API
Используйте следующую команду, чтобы вручную открыть порт 4243 для Remote API:
-H tcp://0.0.0.0:4243 — часть для открытия Remote API.
-H unix:///var/run/docker.sock — часть для доступа к хост-машине через терминал.
Remote API с systemd
Чтобы запустить Remote API с помощью демона Docker, создайте Drop-in сниппет со следующим содержимым:
Конфигурация сокета демона
Демон docker по умолчанию прослушивает Unix-сокет. Чтобы прослушивать определённый порт, создайте Drop-in сниппет со следующим содержимым:
Прокси
Конфигурация прокси
Создайте Drop-in сниппет со следующим содержанием:
Убедитесь, что конфигурация была загружена:
Конфигурация контейнера
Настройки в файле docker.service не применяются к контейнерам. Для этого необходимо задать переменные ENV в Dockerfile следующим образом:
Docker предоставляет подробную информацию о конфигурации с помощью ENV в Dockerfile.
Конфигурация DNS
По умолчанию docker создаёт resolv.conf в контейнере с /etc/resolv.conf на хост-машине, отфильтровывая локальные адреса (например, 127.0.0.1 ). Если это приводит к пустому файлу, тогда используются Google DNS серверы. Если вы используете службу типа dnsmasq для предоставления разрешения имен, вам может потребоваться добавить запись в /etc/resolv.conf для сетевого интерфейса докера, чтобы она не отфильтровывалась.
Запуск Docker с сетью, заданной вручную, в systemd-networkd
Если вы вручную конфигурируете свою сеть, используя systemd-networkd версии 220 или выше, контейнеры, которые вы запускаете с помощью Docker, могут не иметь доступа к вашей сети. Начиная с версии 220, параметр переадресации для данной сети ( net.ipv4.conf. .forwarding ) по умолчанию равен off . Этот параметр запрещает переадресацию IP. Он также конфликтует с Docker, который включает параметр net.ipv4.conf.all.forwarding внутри контейнера.
Обходной путь — отредактировать файл .network в /etc/systemd/network/ , добавив IPForward=kernel на хосте Docker:
Эта конфигурация разрешает переадресацию IP из контейнера, как и ожидалось.
Расположение образов
По умолчанию Docker образы расположены в /var/lib/docker . Они могут быть перемещены в другие разделы. Во-первых, остановите docker.service .
Если вы запустили Docker образы, вам необходимо убедиться, что они полностью размонтированы. После этого вы можете переместить изображения из /var/lib/docker в целевой путь.
Затем добавьте Drop-in сниппет для docker.service , добавив параметр –data-root в ExecStart :
Небезопасные реестры
Если вы решите использовать самозаверенный сертификат для своего личного реестра, Docker откажется использовать его, пока вы не заявите, что доверяете ему. Добавьте Drop-in сниппет для docker.service , добавив –insecure-registry параметр в dockerd :
How-To: Find IDOR (Insecure Direct Object Reference) Vulnerabilities for large bounty rewards

The following is a guest blog post from Mert & Evren, two talented researchers from Turkey. IDOR vulnerabilities are of the higher impact and higher paying vulnerabilities for web bug bounties. This article explores what IDORs are and how to find them.
What is authorization in web/mobile applications?
Web/mobile applications’ session management is very important for end users. Session management consists of two important parts, authentication and authorization. The authentication part is the answer of the “WHO AM I?” question and the authorization part is the answer of the “WHAT CAN I DO?” question.
If we explain with the simplest approach, we are observing the authorization stages on Linux operating system file rights specified as write, read and execute. If a user wants to write a file, that the user must be given the “w” authority. If not used correctly, there are some privacy violations.
What is an IDOR vulnerability?
There can be many variables in the application such as “id”, “pid”, “uid”. Although these values are often seen as HTTP parameters, they can be found in headers and cookies. The attacker can access, edit or delete any of other users’ objects by changing the values. This vulnerability is called IDOR.
First, it needs to understand the application flow developed by the software developers. All the modules functions and their sub-modules functions need to be understood when the logged-in user into the web/mobile application. It is also important to remember that this vulnerability is as severe as XSS, CSRF in security testing and as a type of vulnerability that is not easily discovered (automatized testing or manual testing).
The IDOR vulnerability is illustrated in the following image between user and server.
In this article, the following topics will be addressed:
- How to find the injection point that IDOR vulnerabilities can be found?
- Some IDOR vulnerability tips that seem to be quite simple and the best experiences we have encountered.
- Precautions to taking into consideration while IDOR vulnerability is testing.
- How to provide basic authorization controls?
Effective & fast IDOR vulnerability test
You can use the browser’s secret tab to quickly practically test IDOR vulnerabilities. So, when you use the regular tab as a normal user, you can use the secret tab as an attacker. This will ensure that you don’t logout.
You can use Burp Suite’s HTTP History tab for checking all of requests. The HTTP History feature that shows all the traffic between the device (browser, phone, tablet) and the application’s server. Also, you can use Burp Suite’s scope feature for fast testing. Because the scope feature can be useful to make a target list and the scope feature allows showing only relevant data for your testing scope.
For example; the company “Bugcrowd” that we tested and the scope is only given as “bugcrowd.com” on the scope page. In this case, you can add the relevant scope by right-clicking on a request.
You can edit this added scope value according to the given scope as follows
Finally, you should do the following filtering in the HTTP History tab by selecting “Show only in-scope items”.
These will help you to understand roles like readonly, normal, super etc in the application better.
Capture all requests!
When IDOR vulnerability testing, basically, you need to perform make all the requests that the web/mobile application should be create. Because if you changed something in the application, can create other requests using this case. If you have all API requests of the application like WSDL file, Swagger page etc. and it’s working regularly, you’re in luck! You can use this and it’ll give you convenience for IDOR testing.
An example is encountered in a private program. Credit cards are added when made the purchase in the mobile application. After the requests are tested, it can be thought that there is not any vulnerability. But when a made second purchase, credit card selection screen is seen and the IDOR vulnerability is at this point. When selecting a credit card on here, application will send the credit card id to server in a request and this request did provide to access other users’ credit cards data changing the credit card id.
In another private program, the web application included an in-app messaging system. The user could send messages to other users and add other users to own messages. When the user tries to access one of own messages, a request went to “/messages/5955” and own message id seems to be “5955”. Likewise, when trying to access another user’s message by making a request to “/messages/5955”, the message was not accessed. When the user wanted to add another user to own message, arises a request like the one below.
POST /messages/5955/invite HTTP/1.1Host: example.comUser-Agent: Mozilla/5.0 (Macintosh; Intel Mac OS X 10.12; rv:52.0) Gecko/20100101 Firefox/52.0Accept: */*X-Requested-With: XMLHttpRequestCookie: my_cookiesConnection: closeuser=testaccount2
And when this request is examined, the user can add itself to other users’ messages and access all messages.
In addition, roles in the application must be well understood in order to identify IDOR vulnerability. If you know what that a role should do or should not do, it will be very useful during the phase of weakness detection. So firstly, you should understand the application deeply!
How to find injection points?
As before say, you can find many requests for IDOR vulnerability testing using all features of application. When API endpoints are not provided in IDOR vulnerability tests, .html source code or .js files are useful. These files include interesting things and ajax requests usually. IDOR vulnerability testing can be performed using presented requests in these files. This can be requests made earlier by the application, and possible future requests.
If you are lucky, you can see only the requests that an authorized, admin user should see in javascript files. Because of this, source code and especially javascript files should analyze well.
Also, you can search web application’s old version on “archive.org” and you may can find useful requests in old javascript files or you can search requests in search engines using dorks.
In some cases, id values aren’t unique like 1, 2, 3, 100, 1000 etc, these id values can be encoded or hashed value. If you face an encoded value, you can test the IDOR vulnerability with decoding the encoded value. If you face a hashed value, you should test whether the hash value is an accessible or predictable value. In another case, you can access hashed value in “Referrer“ header, so these scenarios can be replicated.
For example, you can’t access the another users’ objects but you can find object’s hashed id value in the object page’s source code, you can find the object’s hashed id into an in-app message from victim user (this will decrease the impact of bug). So you can create 2 test accounts as X and Y, then try to X’s hashed id value in Y’s requests in Burp History.
If we will touch another topic, some applications’ requests may scare you. For example, the SmartSheet’s request that contains more than one parameter appears to be too complex.
If you wanna find the inject point in this request, you can use Burp Suite’s compare tool. You should right-click on the request and choose “Send to Comparer” option. Then you can create the same request for using another object and send to comparer.
When you visit to the comparer tool and click on the “Words” button, you will be presented with a window where the changing points.
You can use same method for HTTP responses and you can examine their differences.
Interesting cases for IDOR bugs
Manipulate the create requests
Some applications create an id on client-side and then send the in create request to server. This id value can be number such as “-1”, “0” or anything. The existing id values change with the previously created objects’ id. So you can delete / edit other users’ objects using IDOR vulnerability.
If you do not see a parameters like “id”, “user_id”, “value”, “pid”, “post_id” while creating an object, you should add it and test it yourself. You can find the parameter key name by deleting or editing any object on app.
Blind IDOR
In another case, you can find an IDOR vulnerability but you may couldn’t realize of that. For example, if you change the object’s informations in app, you’ll get an email that includes the object’s information. So if you try to change another user’s informations of object, you can’t access anything in HTTP response but you can access the informations of object with an email. You can call it “Blind IDOR”.
Combine them!
IDOR bugs’ impacts are changeable and we’ll touch on that. In some cases, IDOR vulnerabilities can help you by triggering other vulnerabilities that can not be exploited. If you find an unimportant IDOR vulnerability such as editing users non-public & unimportant filename and you wanna raise the impact of your bug, you can use self-XSS bug. The self-XSS vulnerability that you found while the web application testing is generally out of scope and not rewarded. However, you can combine self-XSS vulnerability with another IDOR vulnerability and you can submit report as “IDOR + Stored XSS”. In this way you can achieve a vulnerability of P2 level.
Critical IDORs
IDOR vulnerability allows us to access an account at some time, rather than to edit or delete it. These critical bugs appear in fields such as password reset, password change, account recovery. So firstly, you should double check the link in your email and parameters in it. Then, you can capture the password reset request and examine the parameters with any proxy tool. We have seen many times the “user id” value in these requests and we could takeover to another user’s account easily.
At the same time, it’s an important thing that’s account takeover by header values sent in the request. It is seen that some header values such as “X-User-ID”, “X-UID” from the test and debug environments are changed. So that the user can act like any user and was able to account takeover successfully.
HPP Bug
In rare cases, you can test the HPP (HTTP Parameter Pollution) vulnerability for IDOR testing by adding the same parameter one more time in your request. An example of this: https://www.youtube.com/watch?v=kIVefiDrWUw
Create valid request
You should sure that the request send to the server is correct. If you try send the a user’s request with an other user, you must sure that the this request’s “CSRF-Token” value is valid. So you should put the other user’s “CSRF-Token” to in the request. Otherwise, you will get an error because of token values do not match. This can make you mislead.
Likewise, if your tested request is XHR (XML HTTP Request), you must check the validation of “Content-Type” header parameter in your request. Also, app’s requests may have custom headers like “W-User-Id”, “X-User-Id”, “User-Token” etc. If you wanna do a correct and perfect test, you must send all headers that used by app is correct.
Useful tools
As we mentioned before, you can use Burp Suite features. Also,you can use Burp Suite plugins for IDOR vulnerability testing, such as “Authz”, “AuthMatrix” and “Authorize”.
The Authz plugin provides to see response of requests for another users. So you can send X user’s request to Authz and try to access response of it as Y user. Also, you can add custom header for the testing IDOR vulnerability like “X-CSRF-Token”. You can get it from the BApp Store or in this address.
The AuthMatrix plugin allows you to perform authorization checks by registering cookie values or header values for roles in the application. You can get it from the BApp Store and if you want more information for this nice plugin, go here.
If you have API requests, you can use Wsdler plugin for Burp Suite, SoapUI, Postman etc. You can try all GET, POST, PUT, DELETE, PATCH requests and success and fast API test using the tools.
Impact of IDOR vulnerabilities
IDOR vulnerabilities seems as “VARIES DEPENDING ON IMPACT” in Bugcrowd VRT because of their impact totally depend your submitted bug.
But we have created a list about IDOR vulnerabilities’ impacts based on our experience as follows.
P1 – Account takeover, Access very important data (such as credit card)
P2 – Change / delete another users’ public data, Access private / public important data (such as tickets, invoice, payment information)
P3 – Access / delete / change private data (limited personal info: name, adress etc.)
P4 – Access any unimportant data
IDOR vulnerabilities’ impact depends on the discretion of the program manager.
How to prevent IDOR vulnerabilities?
First, you should control all normal, ajax and API requests when creating an app. For example, can read-only user write anything in app? Or can non-admin user access and create API token that only created by admin user? So, for the test all of IDOR vulnerabilities, you should think like a hacker.
You can provide permission on your application for all endpoints. If your “privatesection” endpoint includes the API requests such as “/api/privatesection/admins”, “/api/privatesection/console”, “/api/privatesection/tokens”, you can block the endpoint for non-admin users.
Also, to make the attacker’s job harder and even sometimes even to prevent it, you can use hash function and use hashed values instead of normal number or strings.
Отключение проверки сертификатов, как способ исправления ошибки ERR_INSECURE_RESPONSE
Если вы доверяете ресурсу, к которому вдруг не стало доступа по причине появления ошибки ERR_INSECURE_RESPONSE, попробуйте отключить проверку сертификатов.
Как отключить проверку сертификатов в Opera, Яндекс.Браузер и Google Chrome
У этих трех браузеров алгоритм действий похож. Нужно снова зайти в дополнительные настройки и в управление сертификатами. Выйдет дополнительное окно, в котором сделайте следующее:
- найдите сертификат проблемного сайта во вкладке “Издатели, не имеющие доверия” и экспортируйте его на компьютер;

- перейдите во вкладку “Доверенные издатели” и импортируйте сохраненный файл;
- при работе с Google Chrome обратите внимание на один момент – перед переносом сертификата отключите в настройках защиту компьютера от опасных сайтов (делайте это только при посещении ресурса, которому доверяете).

Отключение защиты в Google Chrome
Действия в Mozilla Firefox
Перейдите во вкладку “Сертификаты” в дополнительных настройках браузера и нажмите “Просмотр сертификатов”.

Просмотр сертификатов в Mozilla Firefox
Затем во вкладке ”Серверы” нажмите “Добавить исключение”. Перед вами откроется окно, куда введите адрес сайта, на котором не нужно проводить проверку сертификатов. Подтвердите свои действия.

Завершение действий в Mozilla
Одно из рассмотренных выше решений обязательно поможет вам самостоятельно справиться с ошибкой ERR_INSECURE_RESPONSE. Если же проблема остается, значит, неполадки обнаруживаются на самом сервере и нужно просто подождать, пока программисты устранят ошибку.