Get AnyDesk for Android
AnyDesk is the ultimate remote access app for Android-giving you a truly mobile solution to remote desktop connectivity and remote control via android devices. And it’s free for private use! Enjoy seamless connectivity in any setting, for any application. Establish remote desktop links with your office. Use AnyDesk to administer external support for customers.
Connectivity wherever you are! With AnyDesk, you get unparalleled performance, reliable security, and stable connectivity. Our remote desktop app is easy to set up and use and has all the features you need without being cluttered. Thanks to flexible license models, AnyDesk can be easily customized to your specific workflow.

Создание идентификатора Apple ID на устройстве iPhone, iPad или iPod touch
Во время настройки нового устройства iPhone, iPad или iPod touch вам может быть предложено ввести идентификатор Apple ID и пароль. Если у вас нет идентификатора Apple ID, его можно создать в процессе настройки устройства. Это также можно сделать позже в App Store.
Создание идентификатора Apple ID в процессе настройки устройства
- Нажмите «Забыли пароль или нет Apple ID?».
- Нажмите «Создать Apple ID бесплатно».
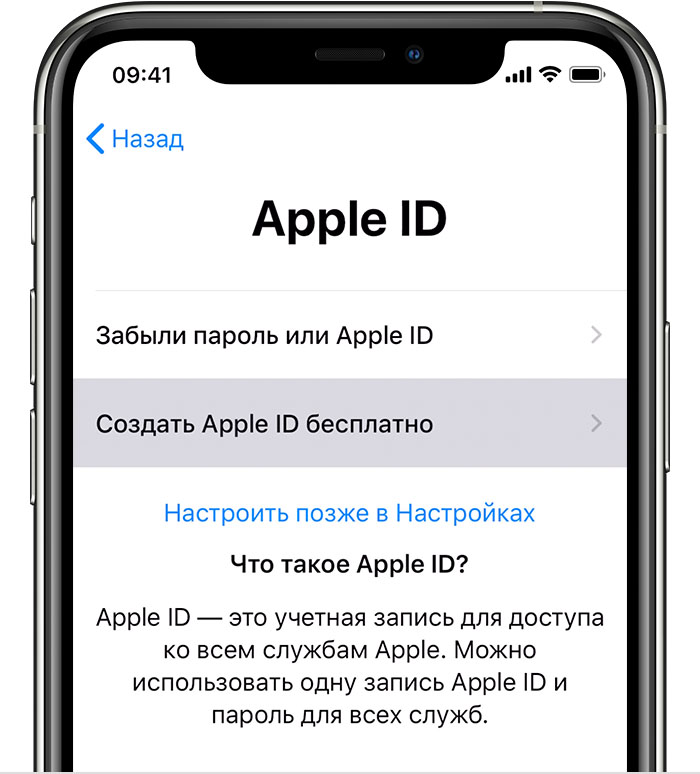

- Укажите свой день рождения и введите имя. Нажмите «Далее».
- Можно выбрать текущий адрес электронной почты или воспользоваться бесплатным адресом электронной почты iCloud.
Создание идентификатора Apple ID с помощью App Store на устройстве
- Откройте App Store и нажмите фотографию профиля .
- Нажмите «Создать новый Apple ID». Если этот вариант не отображается, убедитесь, что вы вышли из iCloud.
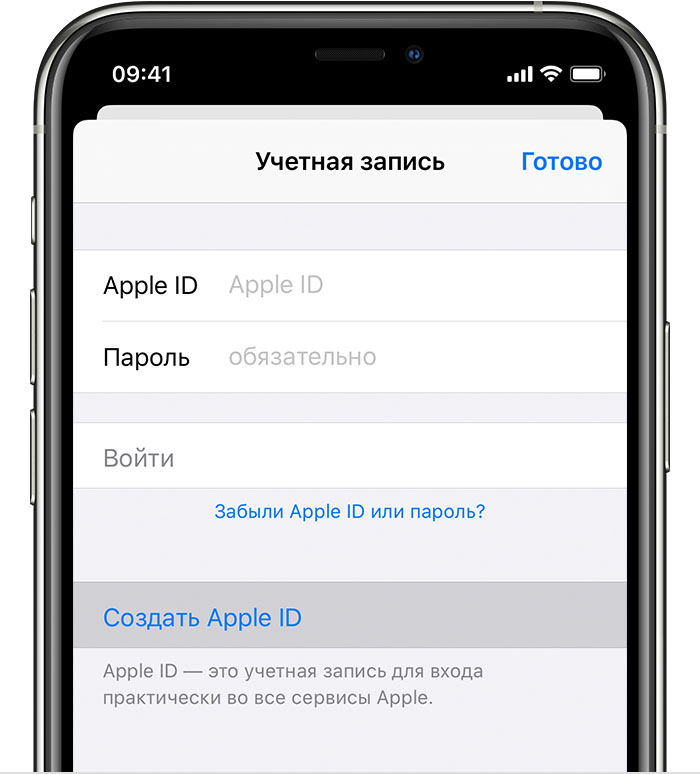
- Введите адрес электронной почты, пароль и выберите страну или регион, которые соответствуют адресу выставления счетов, указанному при выборе способа оплаты. Указанный адрес электронной почты будет вашим новым идентификатором Apple ID*.
- Ознакомьтесь с положениями и условиями политики конфиденциальности Apple, а затем примите их. Нажмите «Далее».
- Введите свое имя и день рождения, а затем при желании подпишитесь на обновления Apple. Это позволит вам оставаться в курсе последних новостей, программного обеспечения, продуктов и служб Apple. Нажмите «Далее».
- Введите данные своей кредитной карты и адрес выставления счетов, а затем нажмите «Готово». Можно также выбрать вариант «Нет» (узнайте, что делать, если он не отображается или его не удается выбрать). Плата будет взиматься только после совершения покупки. Позже вы сможете изменить или удалить платежную информацию.
- Подтвердите свой номер телефона. Это поможет подтвердить вашу личность и восстановить учетную запись в случае необходимости. Нажмите «Далее».
- Проверьте свою электронную почту. Вы должны получить сообщение от Apple — следуйте полученным в нем инструкциям для подтверждения адреса электронной почты. Узнайте, как настроить электронную почту на iPhone, iPad и iPod touch.
Подтвердив свой адрес электронной почты, вы можете воспользоваться идентификатором Apple ID для входа в магазины iTunes Store и App Store, а также другие службы Apple, например iCloud.

Tips for staying safe
First, make sure you’re downloading all apps from trusted sources like the Google Play Store. Google Play Protect, which scans all apps for malware before and after you install them, is automatically enabled on your device. To see more about Play Protect:
- Open your device’s Google Play Store app
- Tap Menu > Play Protect icon
For more information, visit the Help Center.
There are several ways to prevent anyone other than you from using your device.
First, set a screen lock. If your device falls into the wrong hands while you have a screen lock set, it can’t be used unless your screen is unlocked. Next, add your Google account on your device. That way if your device is stolen and wiped, the bad guys can’t factory reset your device.
For more information, visit the Help Center.
If your device has been lost, simply use Find My Device to locate, ring, lock or erase it.
For more information, visit the Help Center.
You can help protect your device by updating your security settings. If you’re not familiar with the Settings app, it’s easy to hop in and start exploring. Here’s how:
- Open your device’s Settings app.
- Scroll down to Security and select it to manage settings ranging from screen security to encryption to device administration.
For more information on each individual setting, visit the Help Center.
Nexus and some of the newer Android devices receive monthly security updates. You can find when the last security update was released by following these steps.
- Open your device’s Settings app.
- Scroll to the bottom and touch About phone or About tablet > Android security patch level.
- The date displayed is when the last security update was released.
For more information on how to check the version of Android you’re running, visit the Help Center.
В каких случаях требуется активация
Активация SIM – процедура, предназначенная для повышения защиты смартфона через имеющийся Mi-аккаунт. Потребность в проведении этой операции возникает при появлении соответствующего сообщения о том, что произошла ошибка активации.
Причин для отображения подобной ошибки на дисплее несколько:
- Так как отправка подобных сообщений происходит через операторов из других стран, имеет место возможная блокировка входящих иностранных сообщений, что решается звонком в службу поддержки оператора;
- Программные баги и ошибки текущей установленной версии прошивки или операционной системы, а также ошибки, возникающие при одновременном пользовании двумя активными картами сим. В большинстве случаев, речь идет о наличии на телефоне установленной «локальной» китайской версии прошивки, которая была лишь русифицирована. В таких случаях, проблема легко решается перепрошивкой;
- Некорректное считывание мобильного номера или же неправильность его ввода пользователем.

Youtube.com/pair ввести код на компьютере
- Перейдите на страницу youtube.com/pair.
- Введите синий код, показанный на экране телевизора, в разделе «Настройка подключения вручную».
- Нажмите Добавить.
Как удалить подключенные устройства на компьютере
- Перейдите на страницу youtube.com/pair.
- В разделе «Подключенные телевизоры» нажмите Изменить, а затем – Удалить.
Android activation что это за приложение
As of 2017.2, Unity integrates the Vuforia Engine, making it even easier to create cutting edge augmented reality experiences for both handheld and headworn devices. You can learn more about the Vuforia Engine platform at developer.vuforia.com.
About Vuforia Engine
Vuforia Engine is a software platform for creating Augmented Reality apps. Developers can easily add advanced computer vision functionality to any application, allowing it to recognize images and objects, and interact with spaces in the real world.
The Vuforia Engine platform supports AR app development for Android, iOS, and UWP devices. See: Vuforia Engine Supported Versions
This Getting Started guide will show you:
- How to add Vuforia Engine with Unity
- How to access Vuforia Engine’s features in Unity
- How to add content and test your Unity project
Adding Vuforia Engine to a Unity project
The Vuforia packages are available through a scoped NPM (Node Package Manager) registry. For more information on this, please see Vuforia Engine Package Hosting for Unity.
Import the utility script, that is available at the Vuforia Engine Download Page, into your Unity project and it will make the necessary changes to your project:
Add or update Vuforia Engine to your Unity Project (SDK Downloads)
Once the scoped registry has been added to your Unity project’s manifest .json file, the latest version of the Vuforia Engine package will be available in the Unity Package Manager UI:

To manually check if new updates are available, go to Help -> Vuforia Engine -> Check for Updates:

Vuforia Engine Game Objects
Vuforia Engine will be visible in the Unity Game Object menu and also in Build Settings and Player Settings.

If this menu is not shown, this means that you did not install Vuforia with Unity (Unity versions before 2019.2) or did not add the Vuforia Engine package to your project (Unity 2019.2 and later).
Accessing Vuforia Engine features in Unity
After activating Vuforia Engine in Unity, you can add features of Vuforia Engine to your project from the Unity GameObject Menu. Please refer to Features Overview for more information on all of the capabilities offered by the Vuforia Engine.
Start by adding an ARCamera. This is a special camera type that supports augmented reality apps for both handheld devices and digital eyewear.
- Add an ARCamera
- Open the global Vuforia Configuration Inspector
- Activate the target databases
- Add targets to your scene
1. Add an ARCamera. Delete Main Camera.
Print Physical Targets
This is a good time to print some targets to work with. You can find these in /Editor/Vuforia/ForPrint . We’ve provided a complete set of high-resolution target prints to get you started.

Printable target PDFs can be found in /Editor/Vuforia/ForPrint
Add Targets to your scene

2. Add targets to your scene
You can add Vuforia Engine targets to your scene by selecting the associated Game Objects in the GameObject> Vuforia menu. A target Game Object will be added in your scene hierarchy, which will be visible in your scene.
Each target object can be configured in the Inspector. Select the database and target name for the target you want to use.
Keep in mind to maintain the correct scale of Vuforia targets. Using targets that deviate in size from the real-life object you wish to track might impact the quality. See Virtual Scene Scale in Unity for more information.
Adding digital assets
You’re now ready to add digital content to augment your target. You can do this by simply adding your assets as children of the target in the scene hierarchy. Parenting content with a target object automatically sets up the necessary rendering and physics behaviors (see: DefaultTrackableEventHandler.cs ).

Add content as a child of the target.
Tip: Delete the default Main Camera after adding an ARCamera. The ARCamera contains its own scene Camera. You won’t need the Main Camera unless you are using it to render a specific camera view.
Playing the scene
Vuforia Engine provides a simulator mode in the Game view that you can activate by pressing the Play button. You can use this feature to evaluate and rapidly prototype your scene(s) without having to deploy to a device.
Play Mode is configured in the Vuforia Configuration section and you may use webcam and simulation mode to test your Vuforia targets. See Vuforia Play Mode in Unity for more information.
Building and running your app
Vuforia Engine-powered Unity apps are built and run in the same way as other Unity apps for Android, iOS, and UWP.
Configuring a project for Digital Eyewear
Vuforia Engine supports a variety of optical and video see-through stereo rendering displays, including HoloLens and Vuzix M300. Refer to the Digital Eyewear article for more information.
Perform the following steps to configure your project for HoloLens:
- In the Edit menu, select Project Settings.
- Select the appropriate platform icon and expand the XR Settings section.
- Select the Virtual Reality Supported checkbox.
- Highlight Virtual Reality SDKs.
- Click the + icon.
- Select Windows Mixed Reality as the top SDK in the list.
Следующий нашим шагом будет загрузка приложения Xiaomi_ADB_Fastboot_Tools_2.3.1 через которое и будет осуществляться удаление приложений. После загрузки необходимо разархивировать приложение и запустить файл XiaomiADBFastbootTools.exe и нажать на кнопку Debloater
На Вашем телефоне должно появиться окно с разрешением на отладку с этого компьютера где необходимо нажать Ок
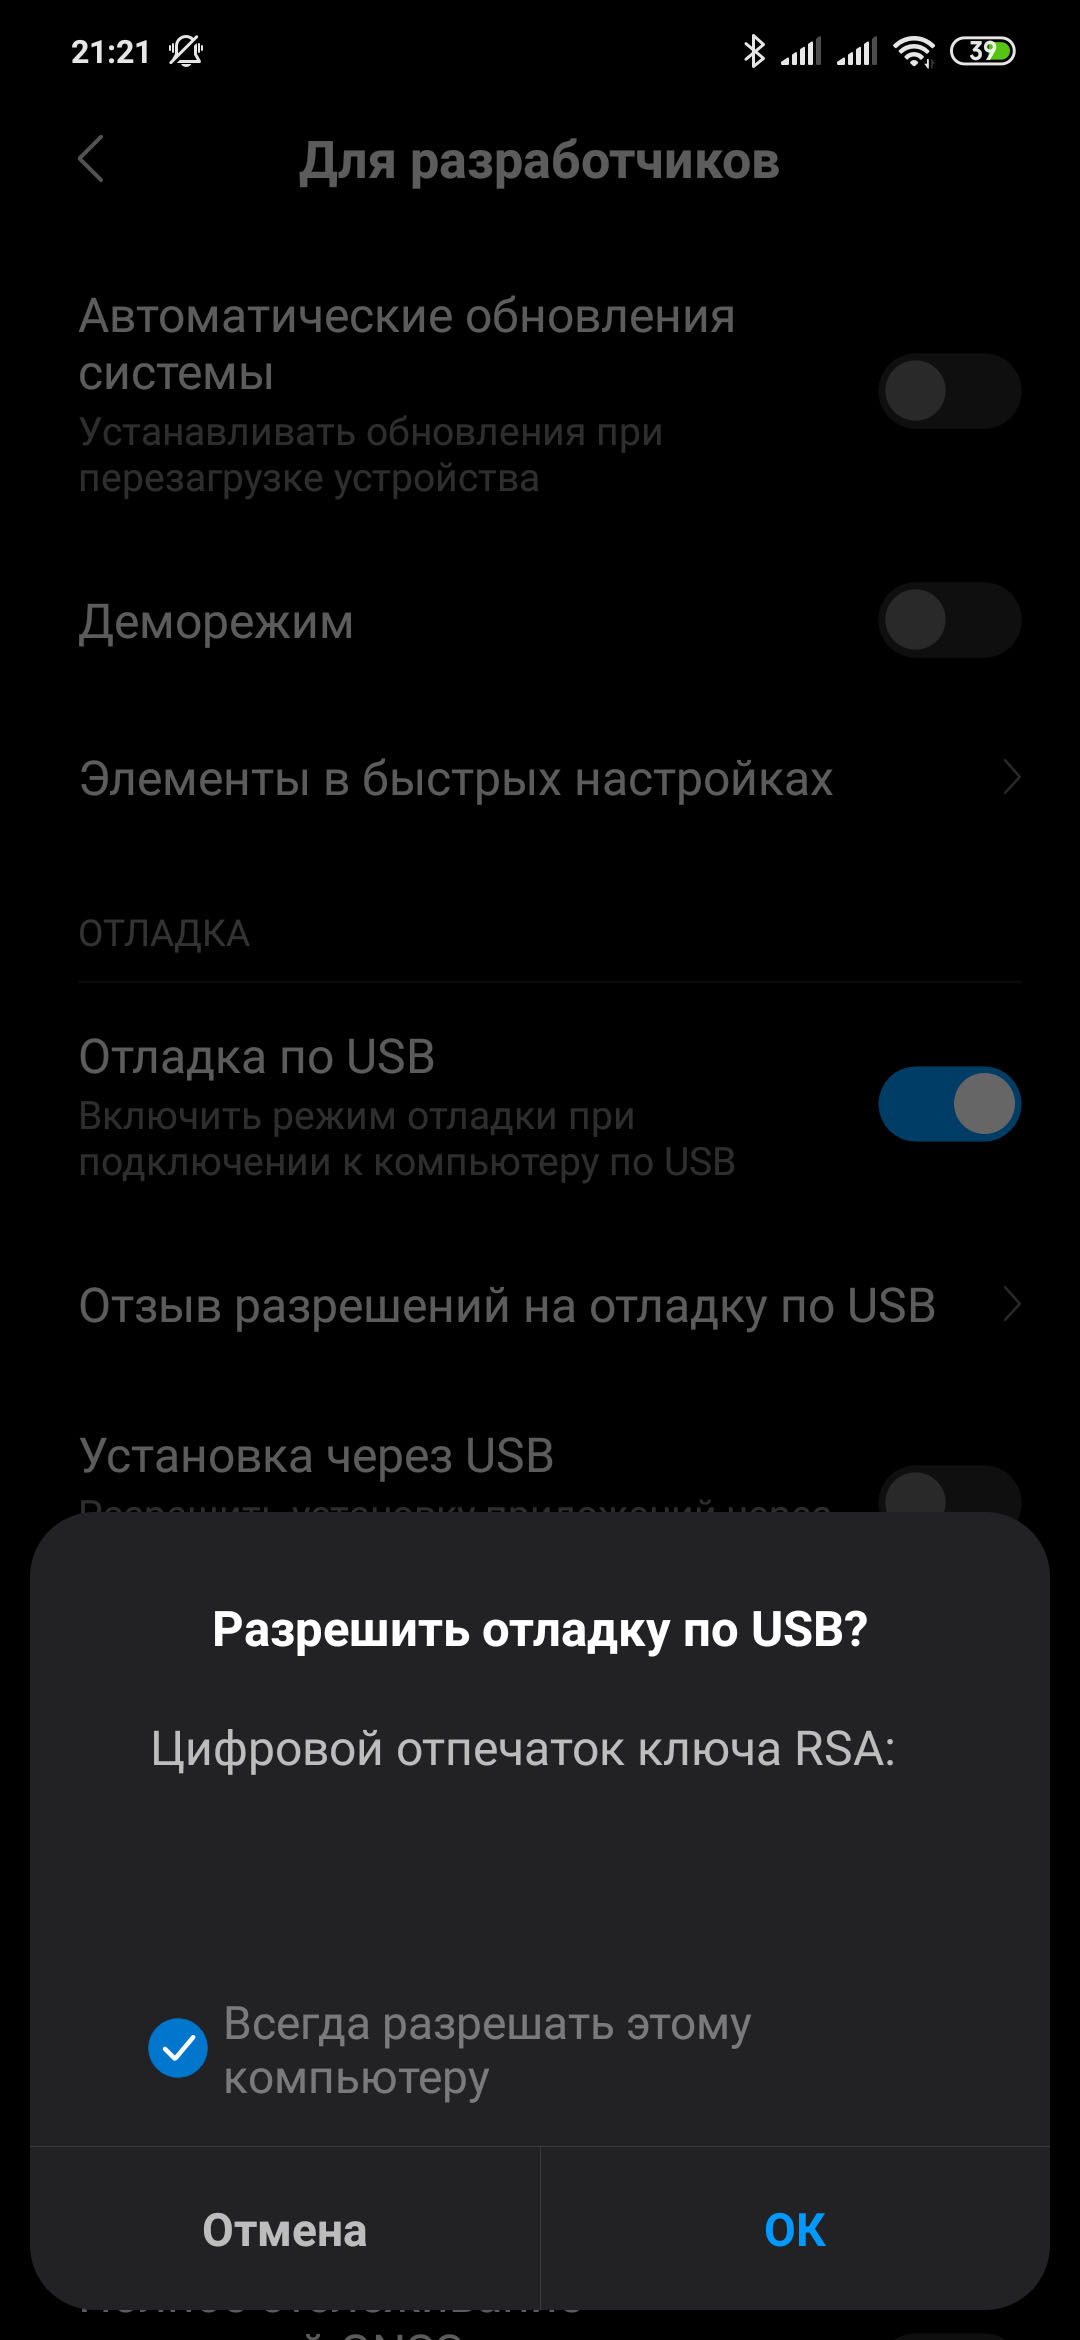 Даем разрешение на отладку по USB
(У меня на Windows 7 после нажатия на кнопку Debloater на телефоне не появлялось окно с разрешением на отладку, решил проблему подключением телефона к другому ПК с Windows 10, напишите в комментариях у кого сработало на Windows 7). В открывшемся новом окне выбираем приложения которые необходимо удалить
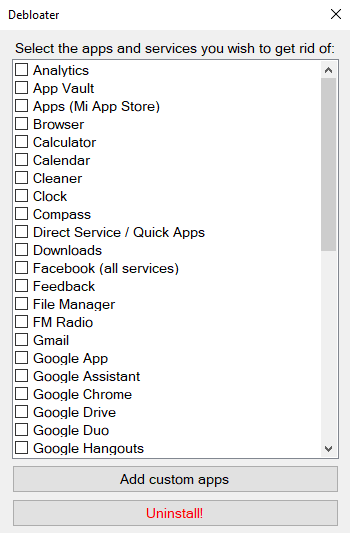 Список приложение которые можно удалить
Если указанного ниже приложения нет в программе, то можно нажать на кнопку add custom apps и ввести название которое указано ниже в списке в скобках, для примера я указал приложение Быстрые приложения. Потом в списке приложений ищем com.miui.hybrid, активируем чекбокс и нажимаем на кнопку Uninstall
 удаление быстрые приложения
Хочу отметить, что не нужно удалять все подряд Вы можете получить кирпич! Все действия вы делаете на свой страх и риск! Ниже список приложений которые можно удалять, каждое приложение имеет описание.
Файлы для установки
В сети интернет можно найти огромное множество игр и софта для телефона.
Но не все подходят для установки на ОС андроид, а только те, которые имеют расширение (набор букв в названии файла после точки) «.apk».
Для их скачивания скачивания и установки также использовать компьютер.
Но прежде чем начать процедуру, нужно подготовить устройство к приему данных. А именно создать дополнительную папку, куда будут сбрасываться игры или другой скаченный софт.
Совет! Лучше поместить папку на карту памяти устройства (sdcard). Вставляется в планшет или телефон отдельно.
Создать папку, предположим с названием «Downloads», можно с помощью Windows после подключения к ПК гаджета. Это самый удобный и быстрый способ.
Можно использовать стандартные для устройства средства по работе с папками и файлами, а также специальный софт ES Проводник.
В последнем случае потребуется скачать программное средство и установить его на планшет или телефон.

Вот так будет выглядеть меню с новым объектом

Вот такой вид будет на телефоне.
Night Mode on older devices
If you have Android 7.0 Nougat or an older Android version, you kind of out of luck. Night Mode comes pre-installed on your OS, but requires work to access. You can’t just toggle it on. There’s an easy workaround though.
First, add the System UI Tuner to your device’s settings, then follow these steps:
- Swipe down twice at the top of your device’s screen. This will expand the Quick Settings menu.
- Press and hold the sprocket icon in the top-right corner to access the settings menu, letting go after about 10 seconds.
- In the settings menu, you’ll see a message that says, “Congrats! System UI Tuner has been added to Settings.”
Next install the Night Mode enabler. You can find it in the Google Play store.

The app only has a single option: a button that says, “Enable Night Mode.” Clicking on it will take you directly to a hidden settings menu in the System UI Tuner. Once there, toggle the on switch.
Bring back Nougat’s Night Mode with this app
Night Mode on Android kicks in at sundown wherever you are. If this isn’t what you want, fear not! You can override this setting and turn it on or off at will.
- Swipe down twice at the top of your device’s screen to expand the Quick Settings menu.
- Tap Edit.
- Scroll down to the Night Mode toggle at the very bottom.
- Long-press the toggle and drag it up to the dark gray area at the top of the menu.
Now you can toggle the feature on and off as a Quick Setting tile, allowing you to override automatic settings.